Complete Polymer 80 PF940C Build Guide: Parts List, Tools & Step-by-Step Instructions
Complete Polymer 80 PF940C Build Guide: Parts List, Tools & Step-by-Step Instructions
Building your own Polymer 80 PF940C pistol is one of the most rewarding projects for firearms enthusiasts. This compact frame, designed to be Glock 19 compatible, offers the perfect balance of concealability and shootability. After helping hundreds of customers complete their P80 builds in our shop, I've compiled this comprehensive guide covering everything you need to know to build your PF940C the right way.
What You'll Need: Complete Parts List
Before starting any build, gather all components. The PF940C requires specific parts that work together as a system:
Frame Kit ($150-180):
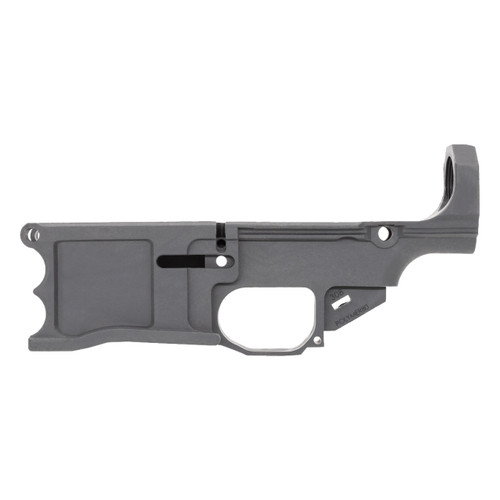
- Polymer 80 PF940C frame in your preferred color
- Jig and drill bits (included)
- Locking block pin
- Trigger housing pin
- Channel liner tool
Slide Assembly ($200-350):
Choose from budget-friendly options like 80P Builder slides ($200-250) or premium options like Zaffiri Precision with RMR cuts ($300-350). Complete slide assemblies include the barrel, recoil spring, and all internals.
Barrel ($80-150):
The PF940C uses Glock 19 compatible barrels. Threaded barrels run $120-150, while standard barrels cost $80-120. Popular brands include Swenson, Brownells, and True Precision.
Upper Parts Kit ($50-80):
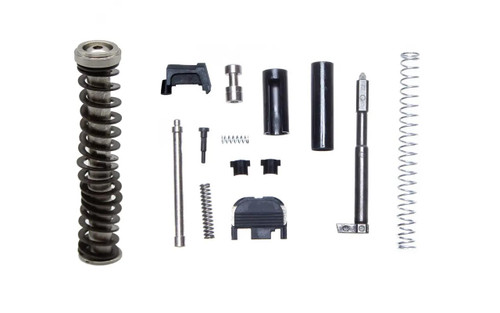
Includes firing pin, firing pin spring, extractor, loaded chamber indicator, spring cups, and trigger spring. OEM parts are most reliable.
Lower Parts Kit ($40-60):
Contains trigger assembly, connector, trigger spring, slide lock, and magazine release. Choose between standard and enhanced triggers.
Sights ($30-80):
Budget steel sights run $30-40, while night sights cost $60-80. Popular choices include Ameriglo and Trijicon.
Essential Tools:
You'll need specific tools for a professional-quality build:
- Dremel rotary tool with cutting wheels
- Pin punch set (1/16", 3/32", 1/8")
- Small vise or clamp
- Various grits of sandpaper (220, 400, 600)
- Drill press (optional but recommended)
- Safety glasses and dust mask
Step-by-Step Build Process:
Step 1: Frame Preparation
Start by examining your PF940C frame. You'll notice several tabs that need removal and pin holes that require drilling. The jig included with your frame kit makes this process straightforward.
Secure the jig to your frame using the provided screws. The jig has pilot holes that correspond to the pin locations on your frame. This ensures perfect alignment.
Step 2: Drilling Pin Holes
Using a drill press set to slow speed (400-600 RPM), carefully drill the trigger housing pin hole and locking block pin hole. Start with a small pilot bit, then step up to the final size. Hand drilling is possible but requires extreme care to maintain perpendicular holes.
Step 3: Tab Removal
Using your Dremel with a cutting wheel, carefully remove the tabs from the frame rails and trigger guard area. Take your time here - removing too much material is irreversible. Sand smooth with 220-grit sandpaper, progressing to 400-grit for a professional finish.
Step 4: Channel Work
The trigger channel requires cleanup to ensure proper trigger function. Use the channel liner tool to smooth any rough spots. The channel should be clean and free of burrs that could interfere with trigger reset.
Step 5: Test Fitting
Before final assembly, test fit all components. The trigger should move freely, and the slide should rack smoothly without binding. Any tight spots should be addressed with careful sanding.
Step 6: Final Assembly
Install the lower parts kit components, starting with the trigger assembly. The connector angle affects trigger feel - standard is 5.5 pounds, while minus connectors reduce pull weight to 4.5 pounds.
Install the locking block and trigger housing pin. These should fit snugly without excessive force.
Common Mistakes and Solutions:
Oversized Pin Holes: The most common error is drilling holes too large. This causes loose pin fit and potential safety issues. Always start small and gradually increase bit size.
Incomplete Tab Removal: Leaving material on the frame rails causes slide binding. Test fit frequently and remove material gradually.
Poor Channel Work: A rough trigger channel causes reset issues. Take time to properly smooth this critical area.
Incorrect Connector Installation: The connector must be properly seated for safe trigger function. Double-check this critical safety component.
Cost Breakdown:
Building a quality PF940C typically costs:
- Budget Build: $450-550 (basic slide, standard parts)
- Mid-Range Build: $550-650 (quality slide, enhanced trigger)
- Premium Build: $650-750 (RMR-cut slide, premium components)
This compares favorably to factory Glock 19 prices while offering complete customization.
Legal Considerations:
Always verify your local and state laws before beginning any build. Federal law currently allows building firearms for personal use without serialization, but some states have additional restrictions.
Where to Find Parts:
For all your PF940C build components, check out our extensive selection:
- 80% Frames for PF940C frames
- Handgun Parts for slides, barrels, and internals
- Complete Build Kits for everything in one package
Building a PF940C is an rewarding experience that results in a reliable, customized pistol. Take your time, follow proper procedures, and you'll have a firearm you can be proud of. The key is preparation, patience, and attention to detail. Happy building!